


ARTIK + MKR1000 + DHT11 + MQTT
コンポーネントと消耗品
>  |
| × | 2 | |||
 |
| × | 1 | |||
 |
| × | 2 |
アプリとオンラインサービス
>  |
| |||
 |
|
このプロジェクトについて
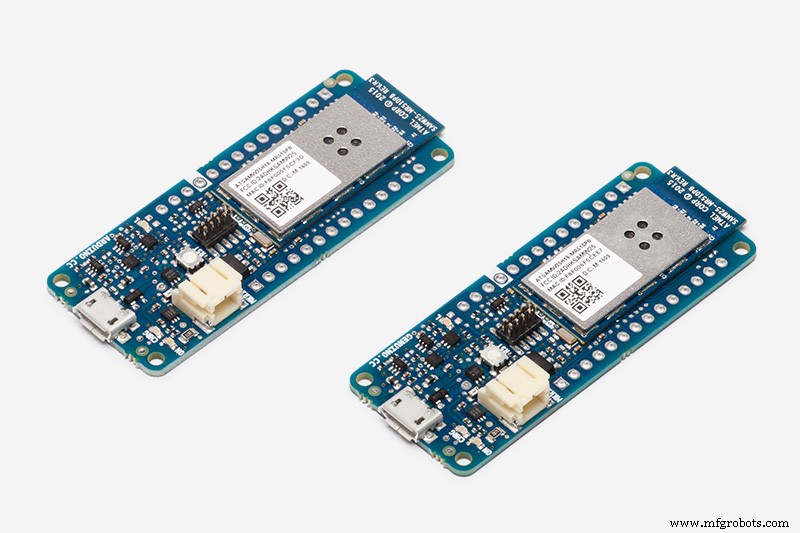
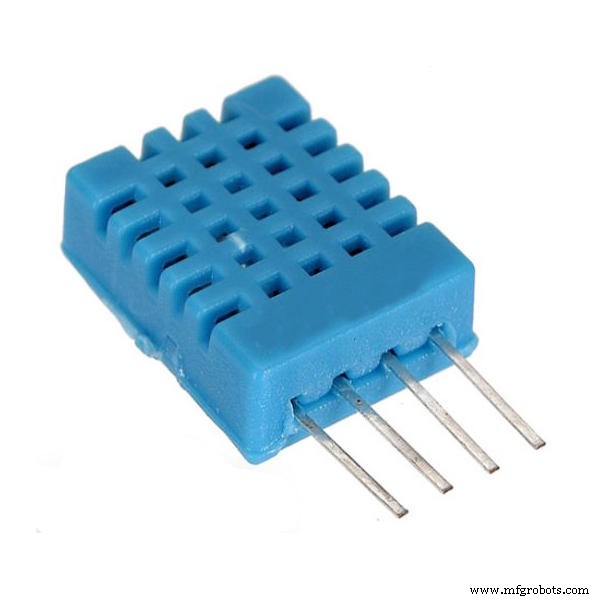
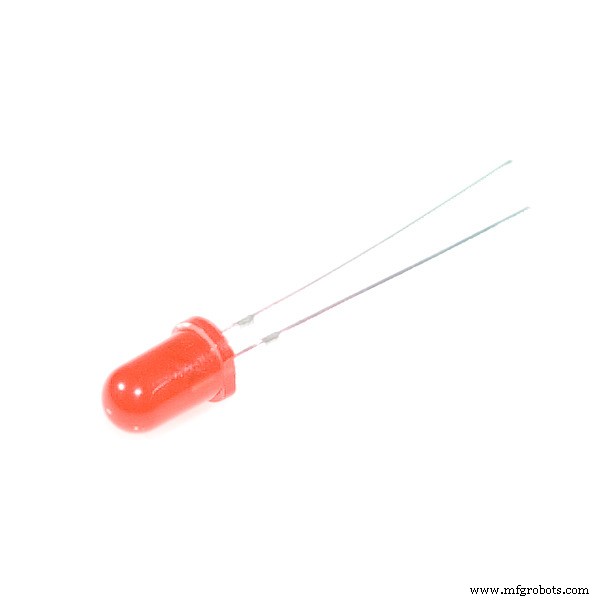
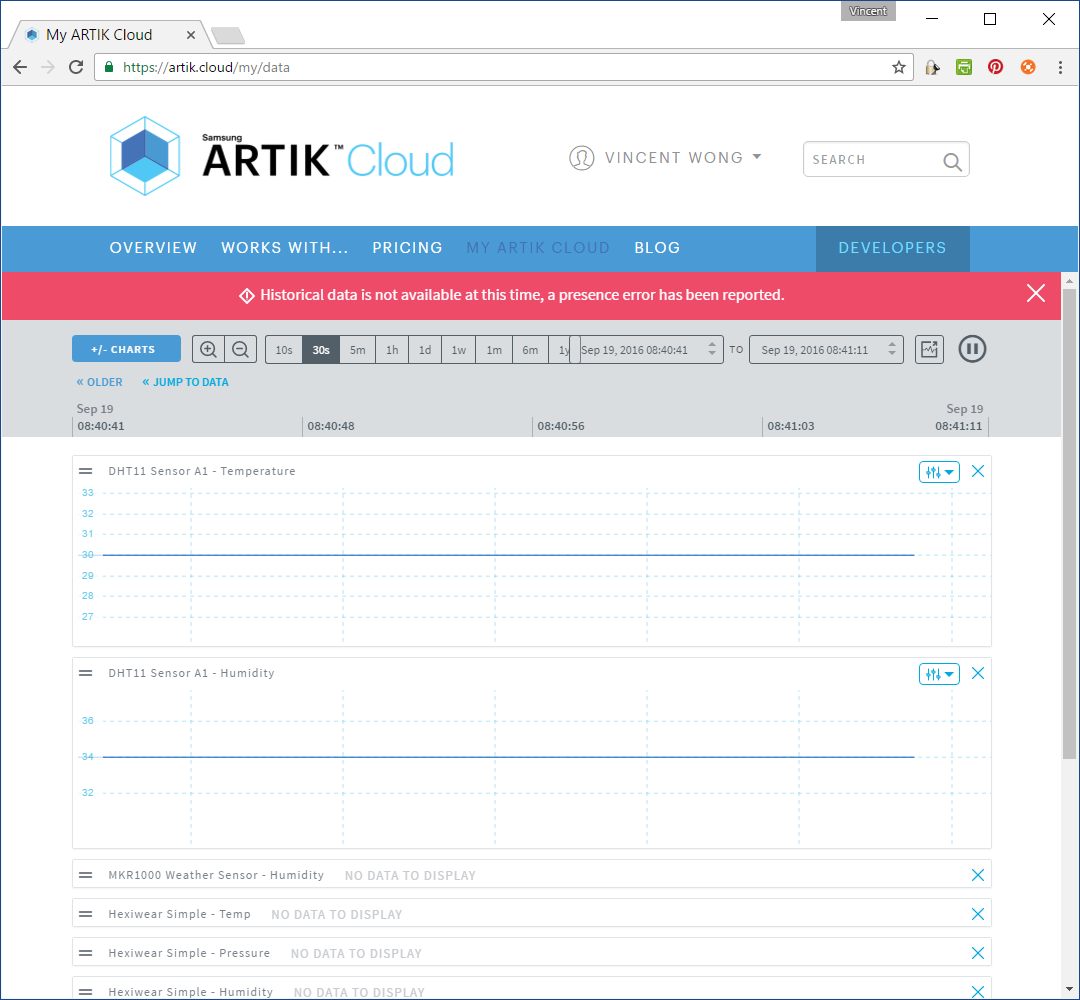
このプロジェクトでは、センサーとしてDHT11を、メタファーアクチュエーターとしてLEDを備えた2つのMKR1000を使用します。実際のアクチュエータは、エアコンと天井ファンである可能性があります。 DHT11温度および湿度デバイスは、ARTIKクラウドにデータを送信します。赤と黄色のLEDにコマンドを送信するルールが設定されています。
ArduinoIDEのセットアップ
Arduino IDEのライブラリマネージャーを使用して、次のライブラリをインストールします。
WiFi101をインストールします(このガイドを参照)
<図>
JoelGaehwilerによるMQTTのインストール
<図>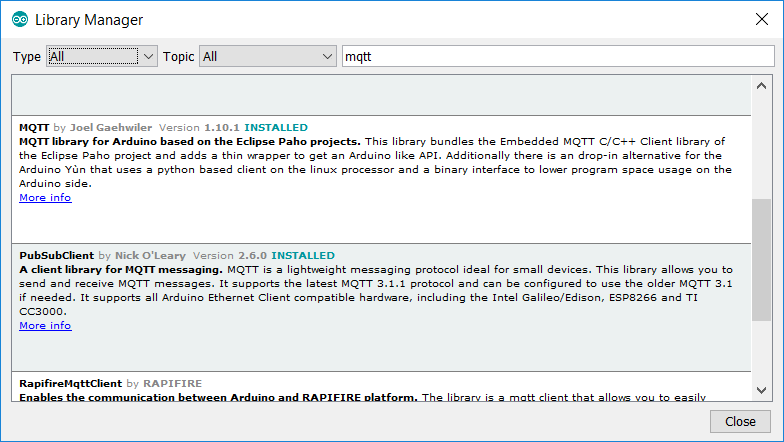
ArduinoJsonをインストールする
<図>
注:私のを参照してください 以前の投稿 ARTIKクラウドの操作の詳細を確認してください。
DHT11温度および湿度センサーをセットアップします
デバイスタイプを作成します( DHT11センサー )
デバイスを接続します( DHT11センサーA1 )
物理デバイスを接続する
。
<図>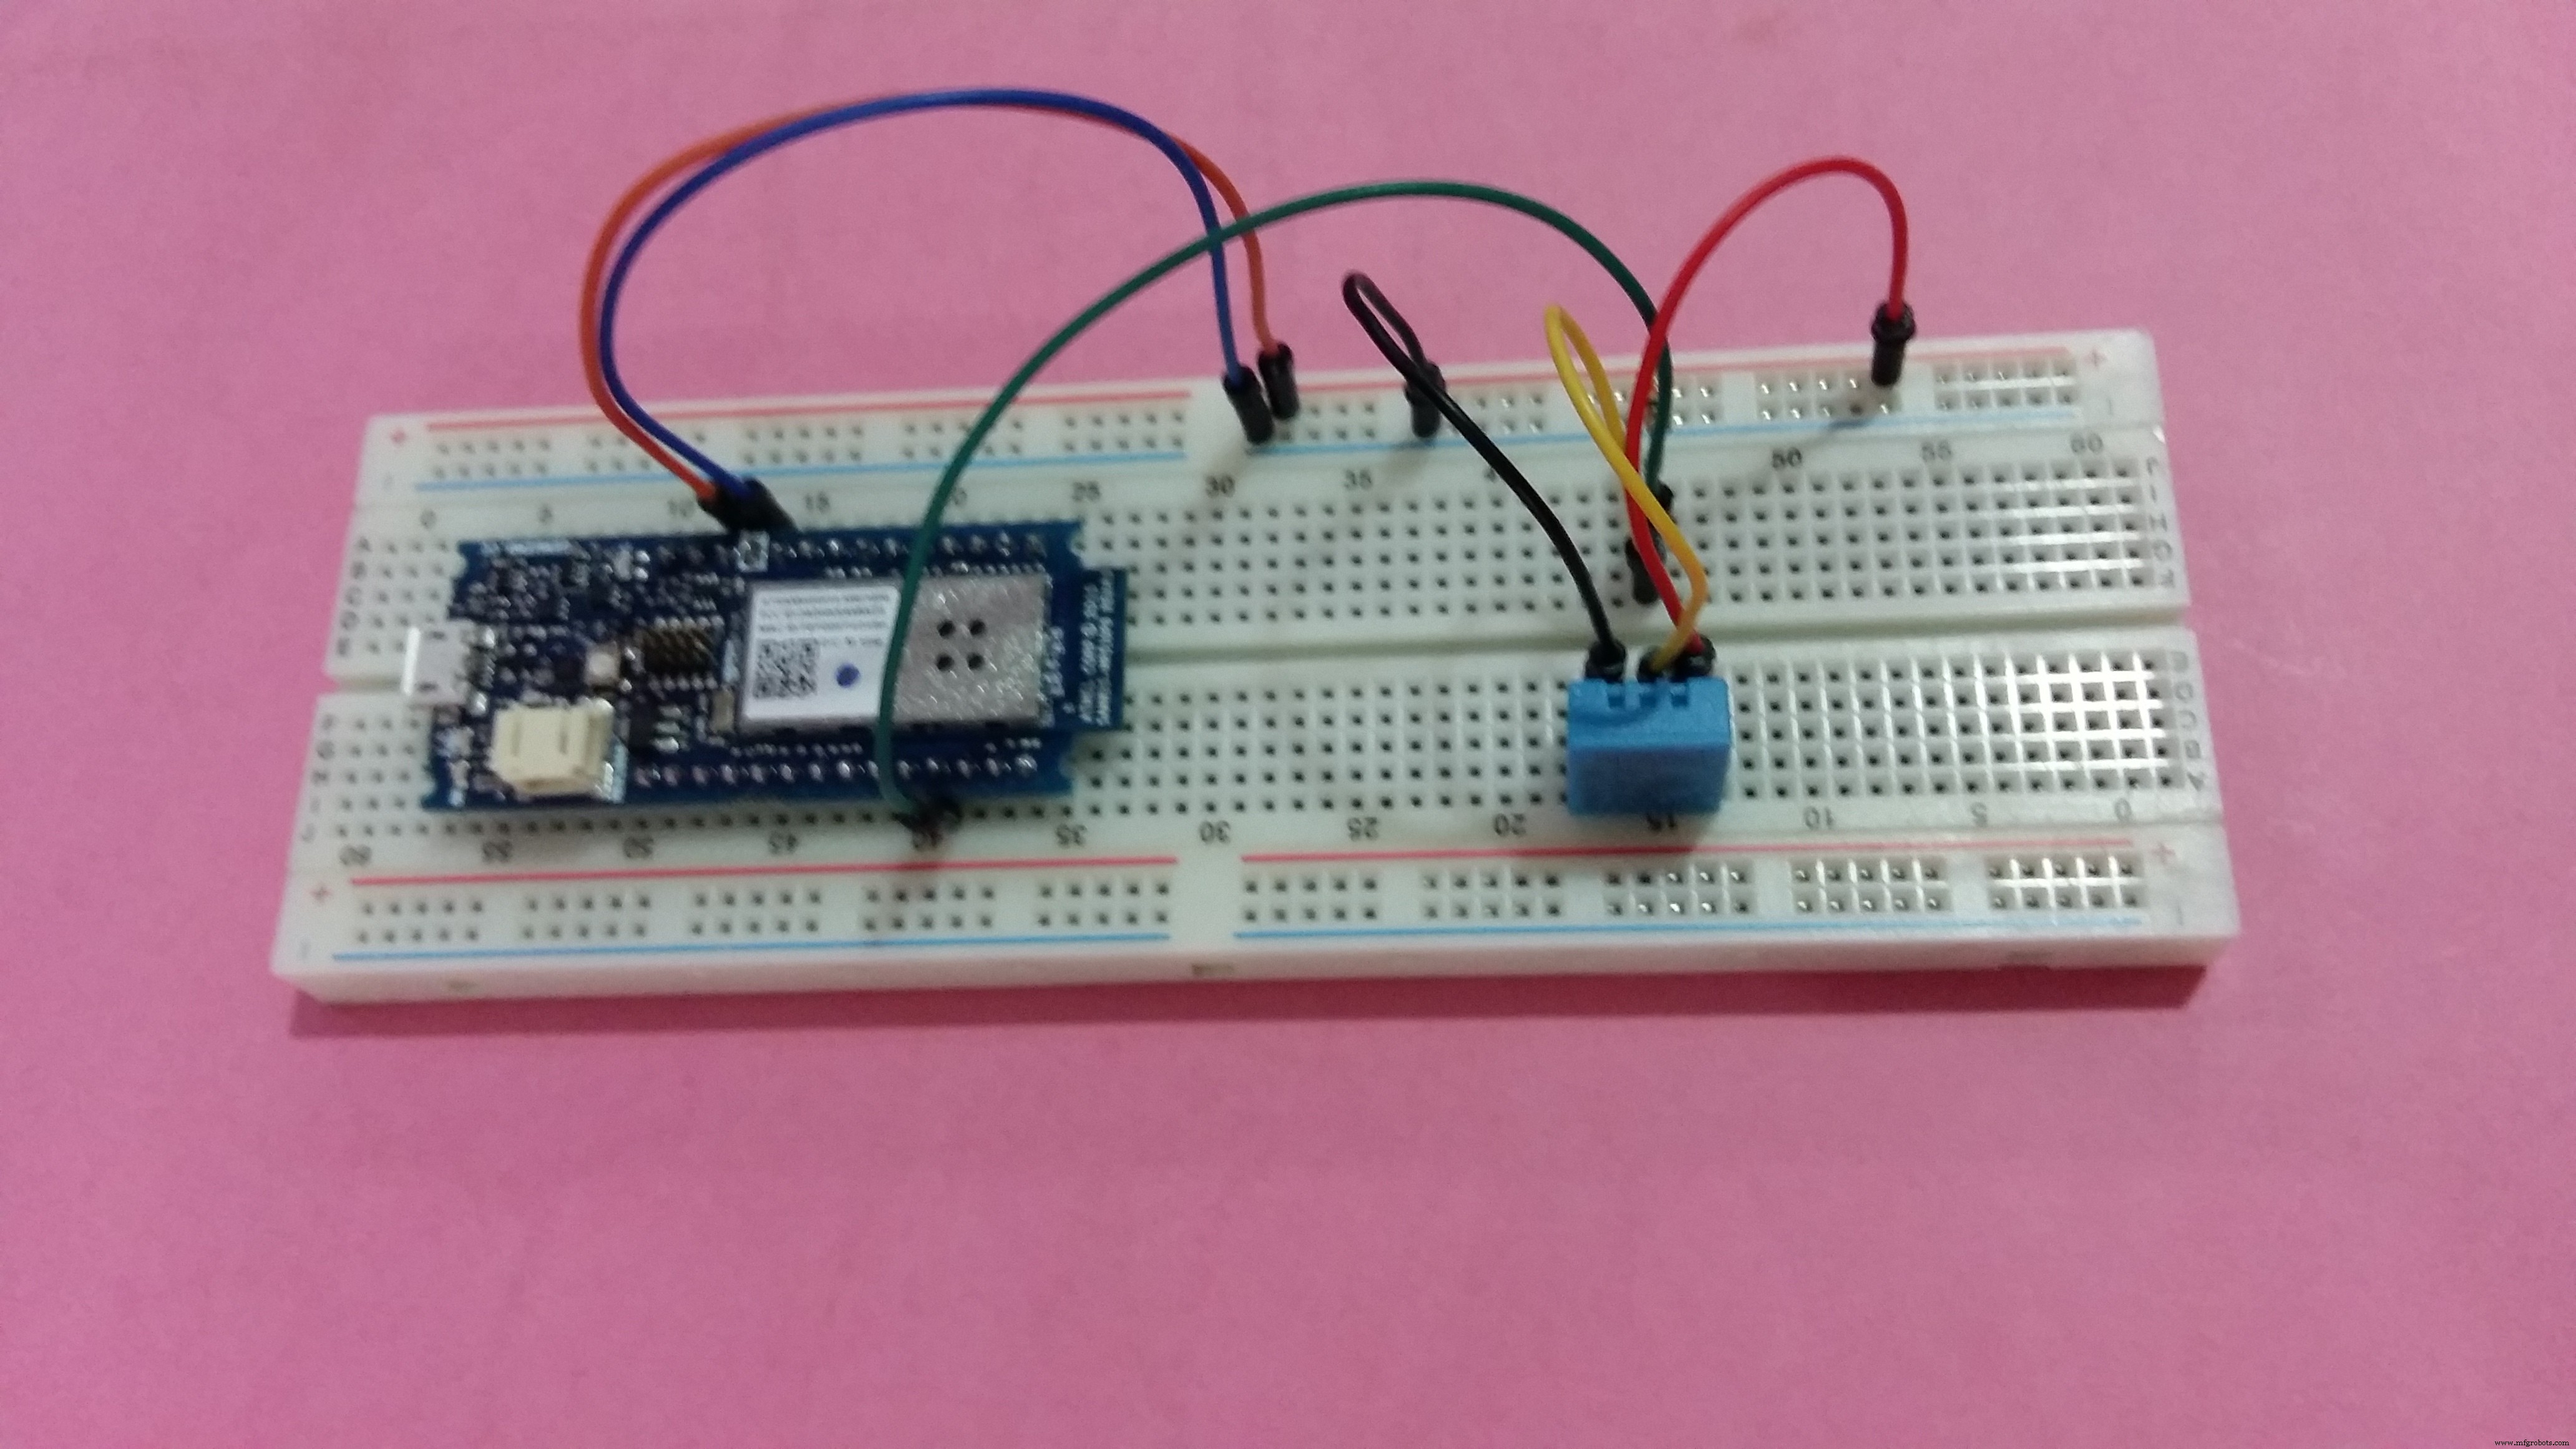
ARTIKクラウドMQTTパラメーターを設定します
char mqttCloudServer [] ="api.artik.cloud"; int mqttCloudPort =8883; char mqttCloudClientName [] ="ARTIK-Arduino"; char mqttCloudUsername [] ="[device-id]"; char mqttCloudPassword [] ="[device-token]"; char mqttCloudDataOut [] ="/v1.1/messages/[device-id]"; WiFiSSLClient ipCloudStack; MQTTClient mqttCloudClient; ARTIKクラウドにメッセージを送信します。
void sendToArtikCloud(フロート温度、フロート湿度){loadBuffer(温度、湿度); //現在の値をバッファにロードしますmqttCloudClient.publish(mqttCloudDataOut、buf); } void loadBuffer(フロート温度、フロート湿度){StaticJsonBuffer <200> jsonBuffer; JsonObject&dataPair =jsonBuffer.createObject(); dataPair ["temperature"] =温度; dataPair ["humidity"] =湿度; dataPair.printTo(buf、sizeof(buf)); } <図>
<図>
<図>

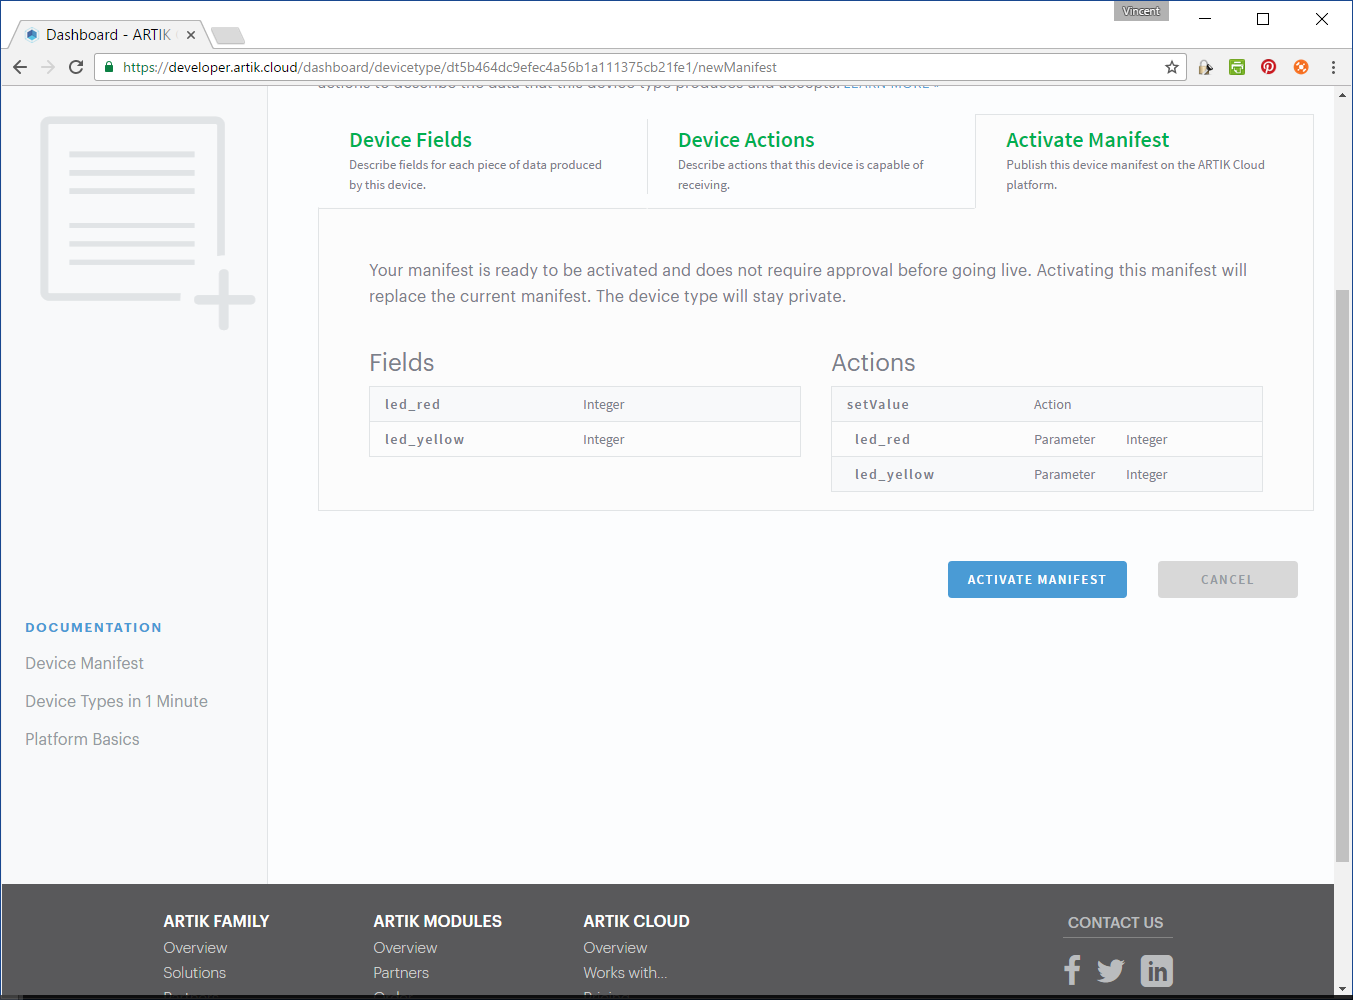
LEDの温度と湿度のアクチュエータをセットアップします
デバイスタイプを作成します( DHT11アクター )
デバイスを接続します( DHT11 Actor A1 )
物理デバイスを接続する
<図>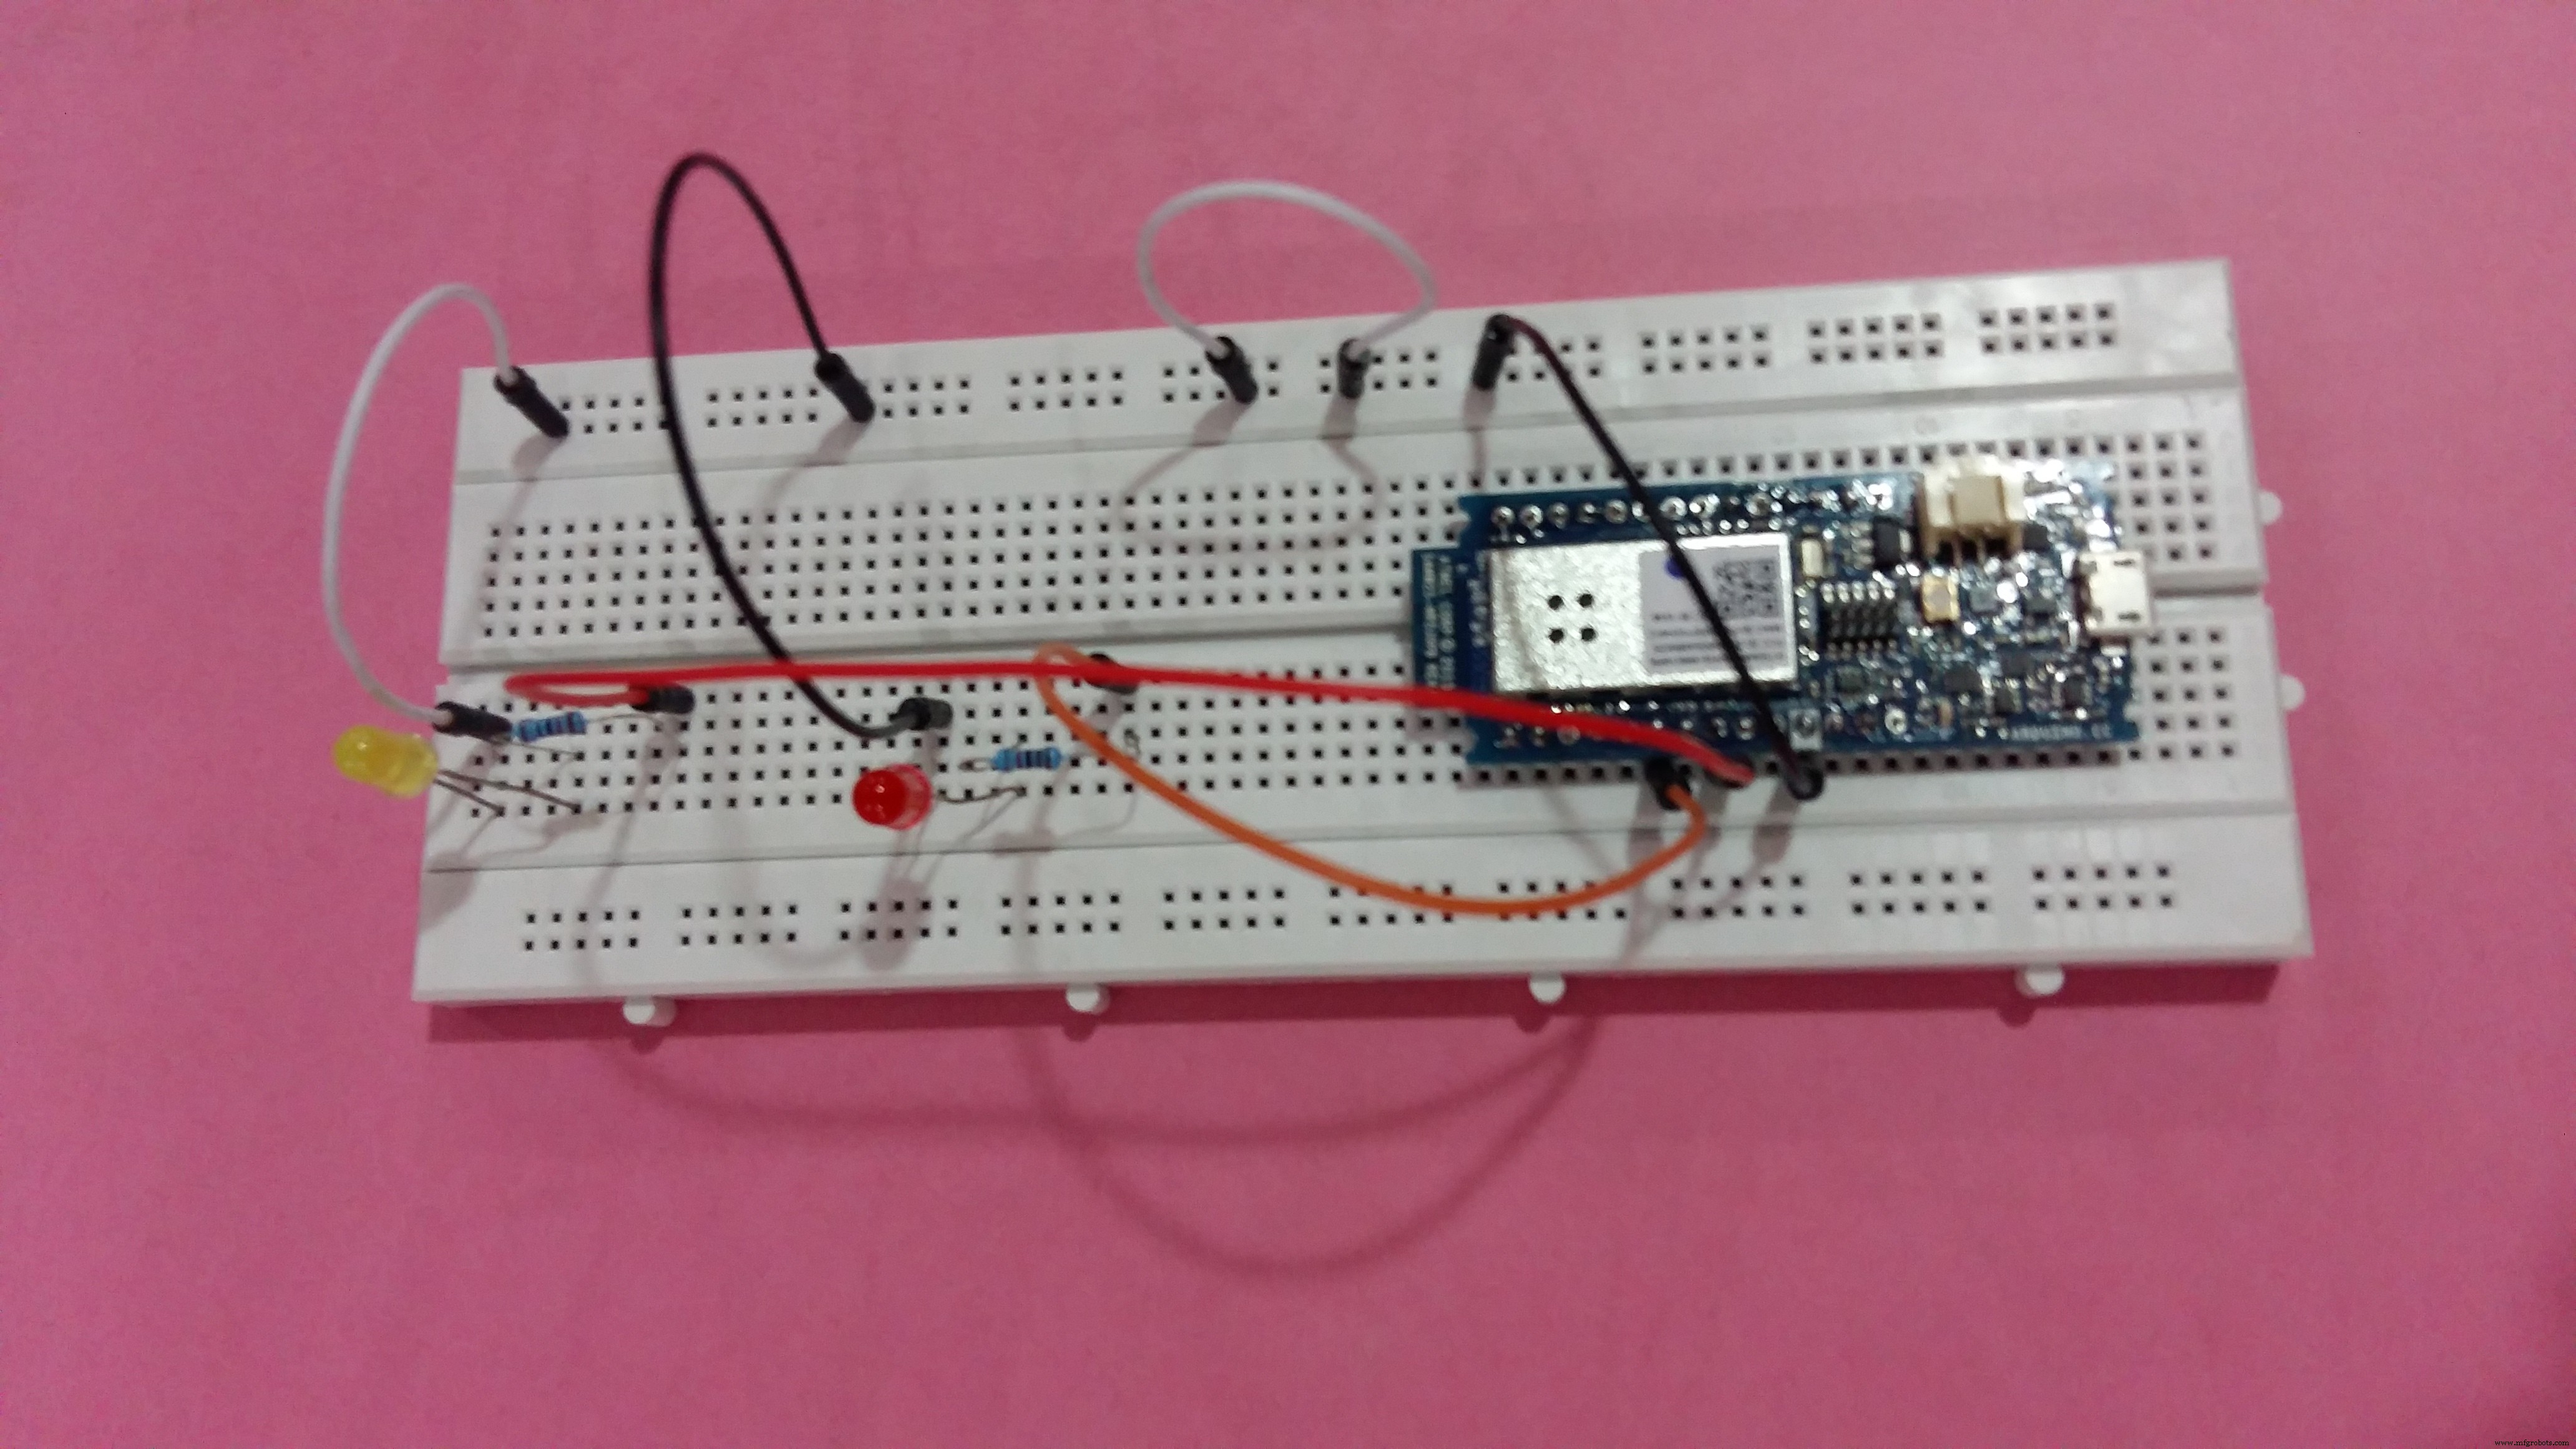
ARTIKクラウドMQTTパラメーターのセットアップ
// ARTIK Cloud MQTT params char mqttCloudServer [] ="api.artik.cloud"; int mqttCloudPort =1883; char mqttCloudClientName [] ="ARTIK-Arduino"; char mqttCloudUsername [] ="[device-id]"; char mqttCloudPassword [] ="[device-token]"; char mqttCloudActionsIn [] ="/v1.1/actions/[device-id]"; WiFiClient ipCloudStack; MQTTClient mqttCloudClient; MQTTアクションを受信します。
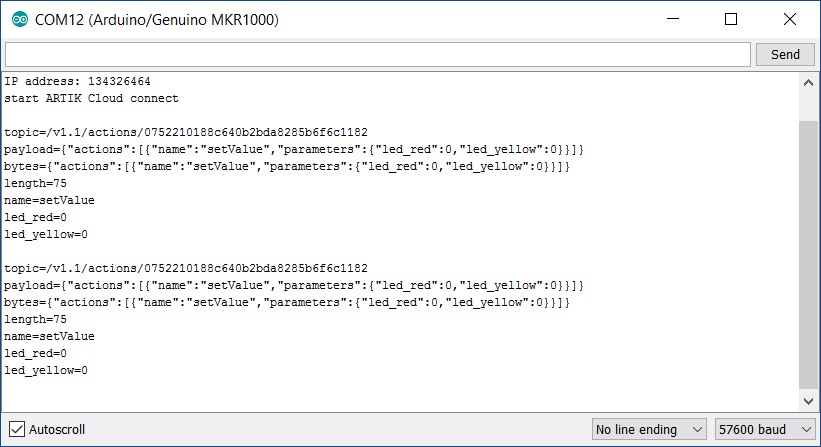
void messageReceived(String topic、Stringpayload、char * bytes、unsigned int length){Serial.print( "topic ="); Serial.println(トピック); Serial.print( "payload ="); Serial.println(ペイロード); Serial.print( "bytes ="); Serial.println(バイト); Serial.print( "length ="); Serial.println(長さ); parseBuffer(payload); } ARTIKクラウドからのアクションを解析して処理します。
void parseBuffer(Stringpayload){StaticJsonBuffer <200> jsonBuffer;文字列json =ペイロード; JsonObject&root =jsonBuffer.parseObject(json); const char * nameparam =root ["actions"] [0] ["name"]; const int actionLEDRed =root ["actions"] [0] ["parameters"] ["led_red"]; const int actionLEDYellow =root ["actions"] [0] ["parameters"] ["led_yellow"]; Serial.print( "name ="); Serial.println(nameparam); Serial.print( "led_red ="); Serial.println(actionLEDRed); Serial.print( "led_yellow ="); Serial.println(actionLEDYellow); Serial.println(); if(actionLEDRed ==1){if(savedRedValue!=actionLEDRed){digitalWrite(LED_RED_PIN、HIGH); savedRedValue =actionLEDRed; } savedRedTime =millis(); } else {if(savedRedValue!=actionLEDRed){if(millis()-savedRedTime> RED_DELAY){digitalWrite(LED_RED_PIN、LOW); savedRedValue =actionLEDRed; }}} if(actionLEDYellow ==1){if(savedYellowValue!=actionLEDYellow){digitalWrite(LED_YELLOW_PIN、HIGH); savedYellowValue =actionLEDYellow; } savedYellowTime =millis(); } else {if(savedYellowValue!=actionLEDYellow){if(millis()-savedYellowTime> YELLOW_DELAY){digitalWrite(LED_YELLOW_PIN、LOW); savedYellowValue =actionLEDYellow; }}}} <図>
<図>
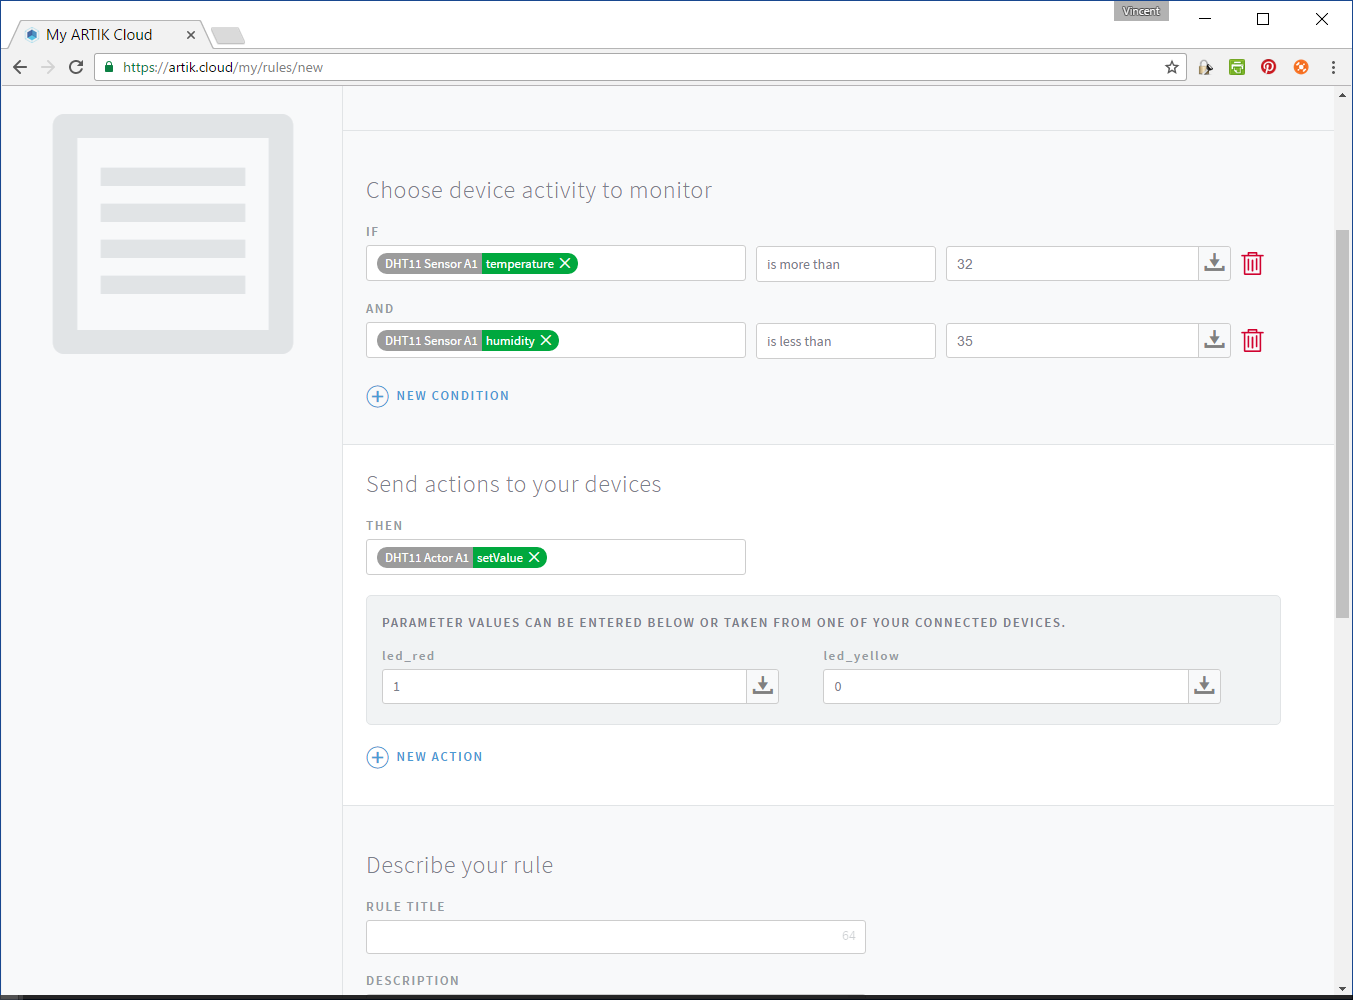
ルールを作成する <図>
<図>
<図>
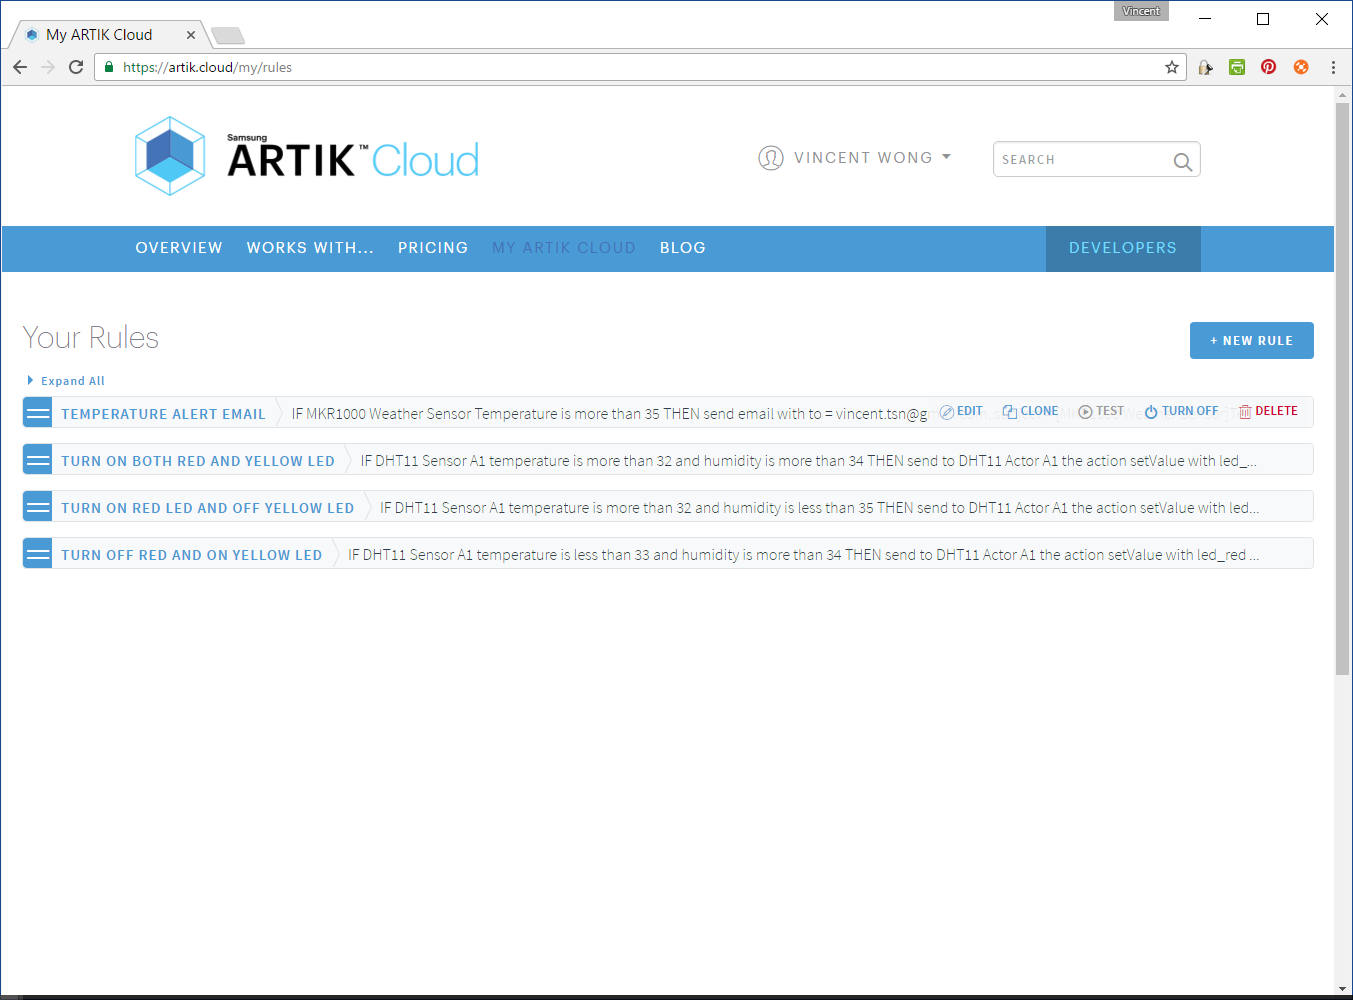
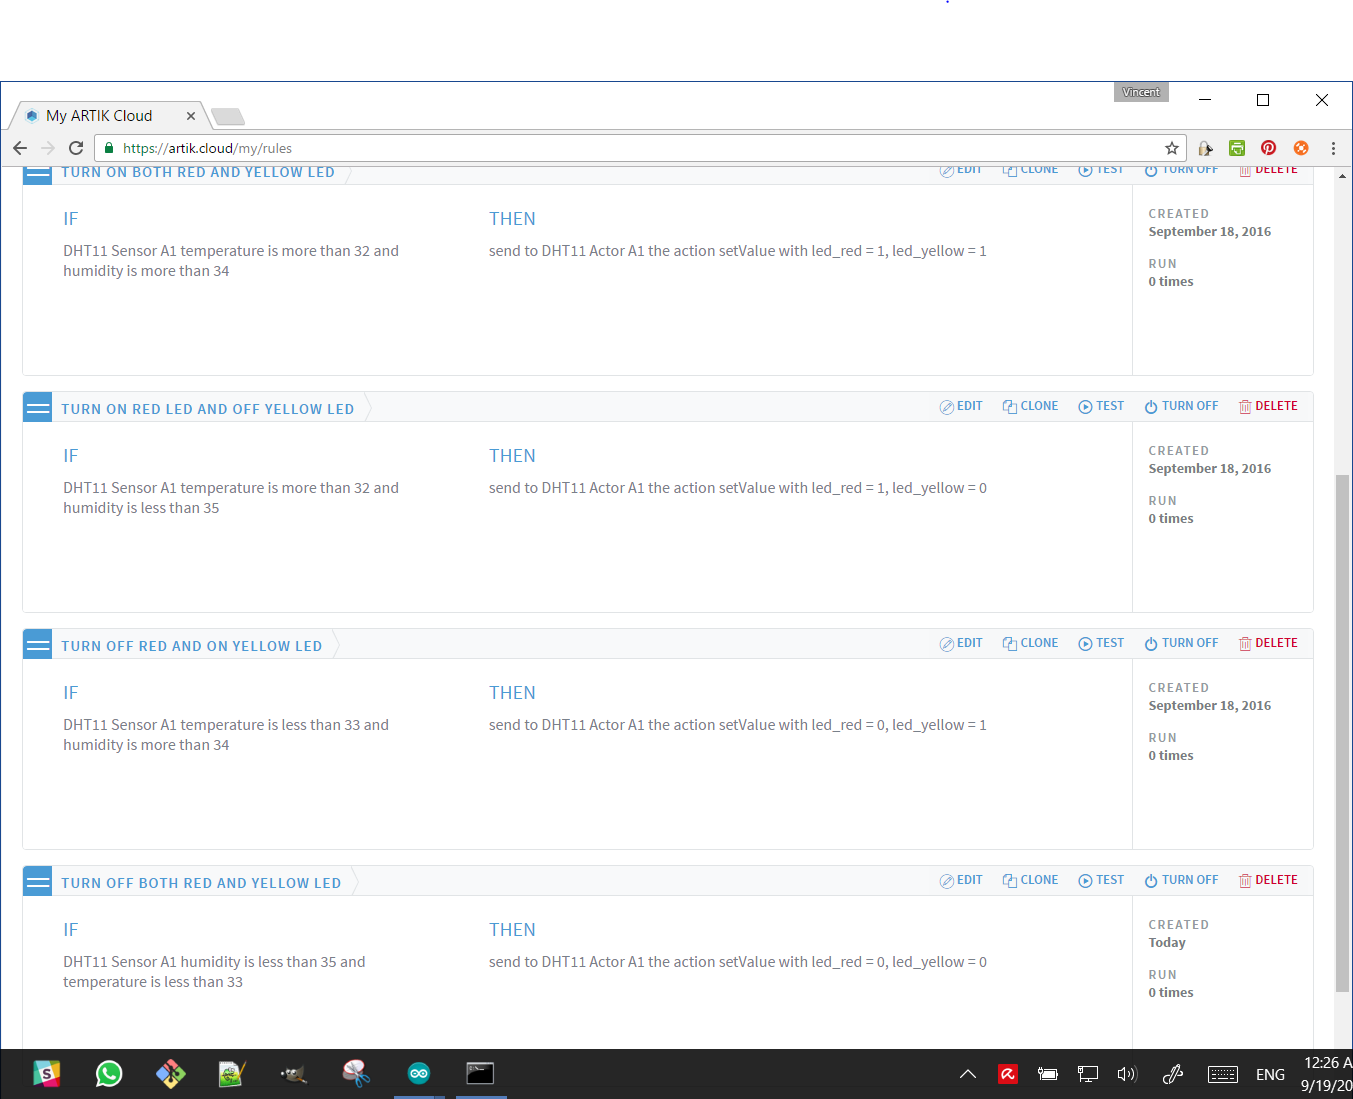
4つのルールがあります:
- IF DHT11センサーA1の温度が32を超え、湿度が34を超える 次に、 DHT11アクターA1に、led_red =1、led_yellow =1 のアクションsetValueを送信します。
- IF DHT11センサーA1の温度が32を超え、湿度が35未満 次に、 DHT11アクターA1に、led_red =1、led_yellow =0 のアクションsetValueを送信します。
- IF DHT11センサーA1の温度が33未満、湿度が34を超える 次に、 DHT11アクターA1に、led_red =0、led_yellow =1のアクションsetValueを送信します
- IF DHT11センサーA1の湿度が35未満、温度が33未満 次に、 DHT11アクターA1に、led_red =0、led_yellow =0 のアクションsetValueを送信します。
デモビデオ
温度が上昇(LEDがオン)および冷却(LEDがオフ)するまで待つ必要があることに注意してください。赤いLEDは37秒でオンになり、1:13秒でオフになります。デモビデオは、温度変化のみを示しています。ヘアドライヤーを使用して、DHT11センサーの周囲の温度を変更しました。
。
<図>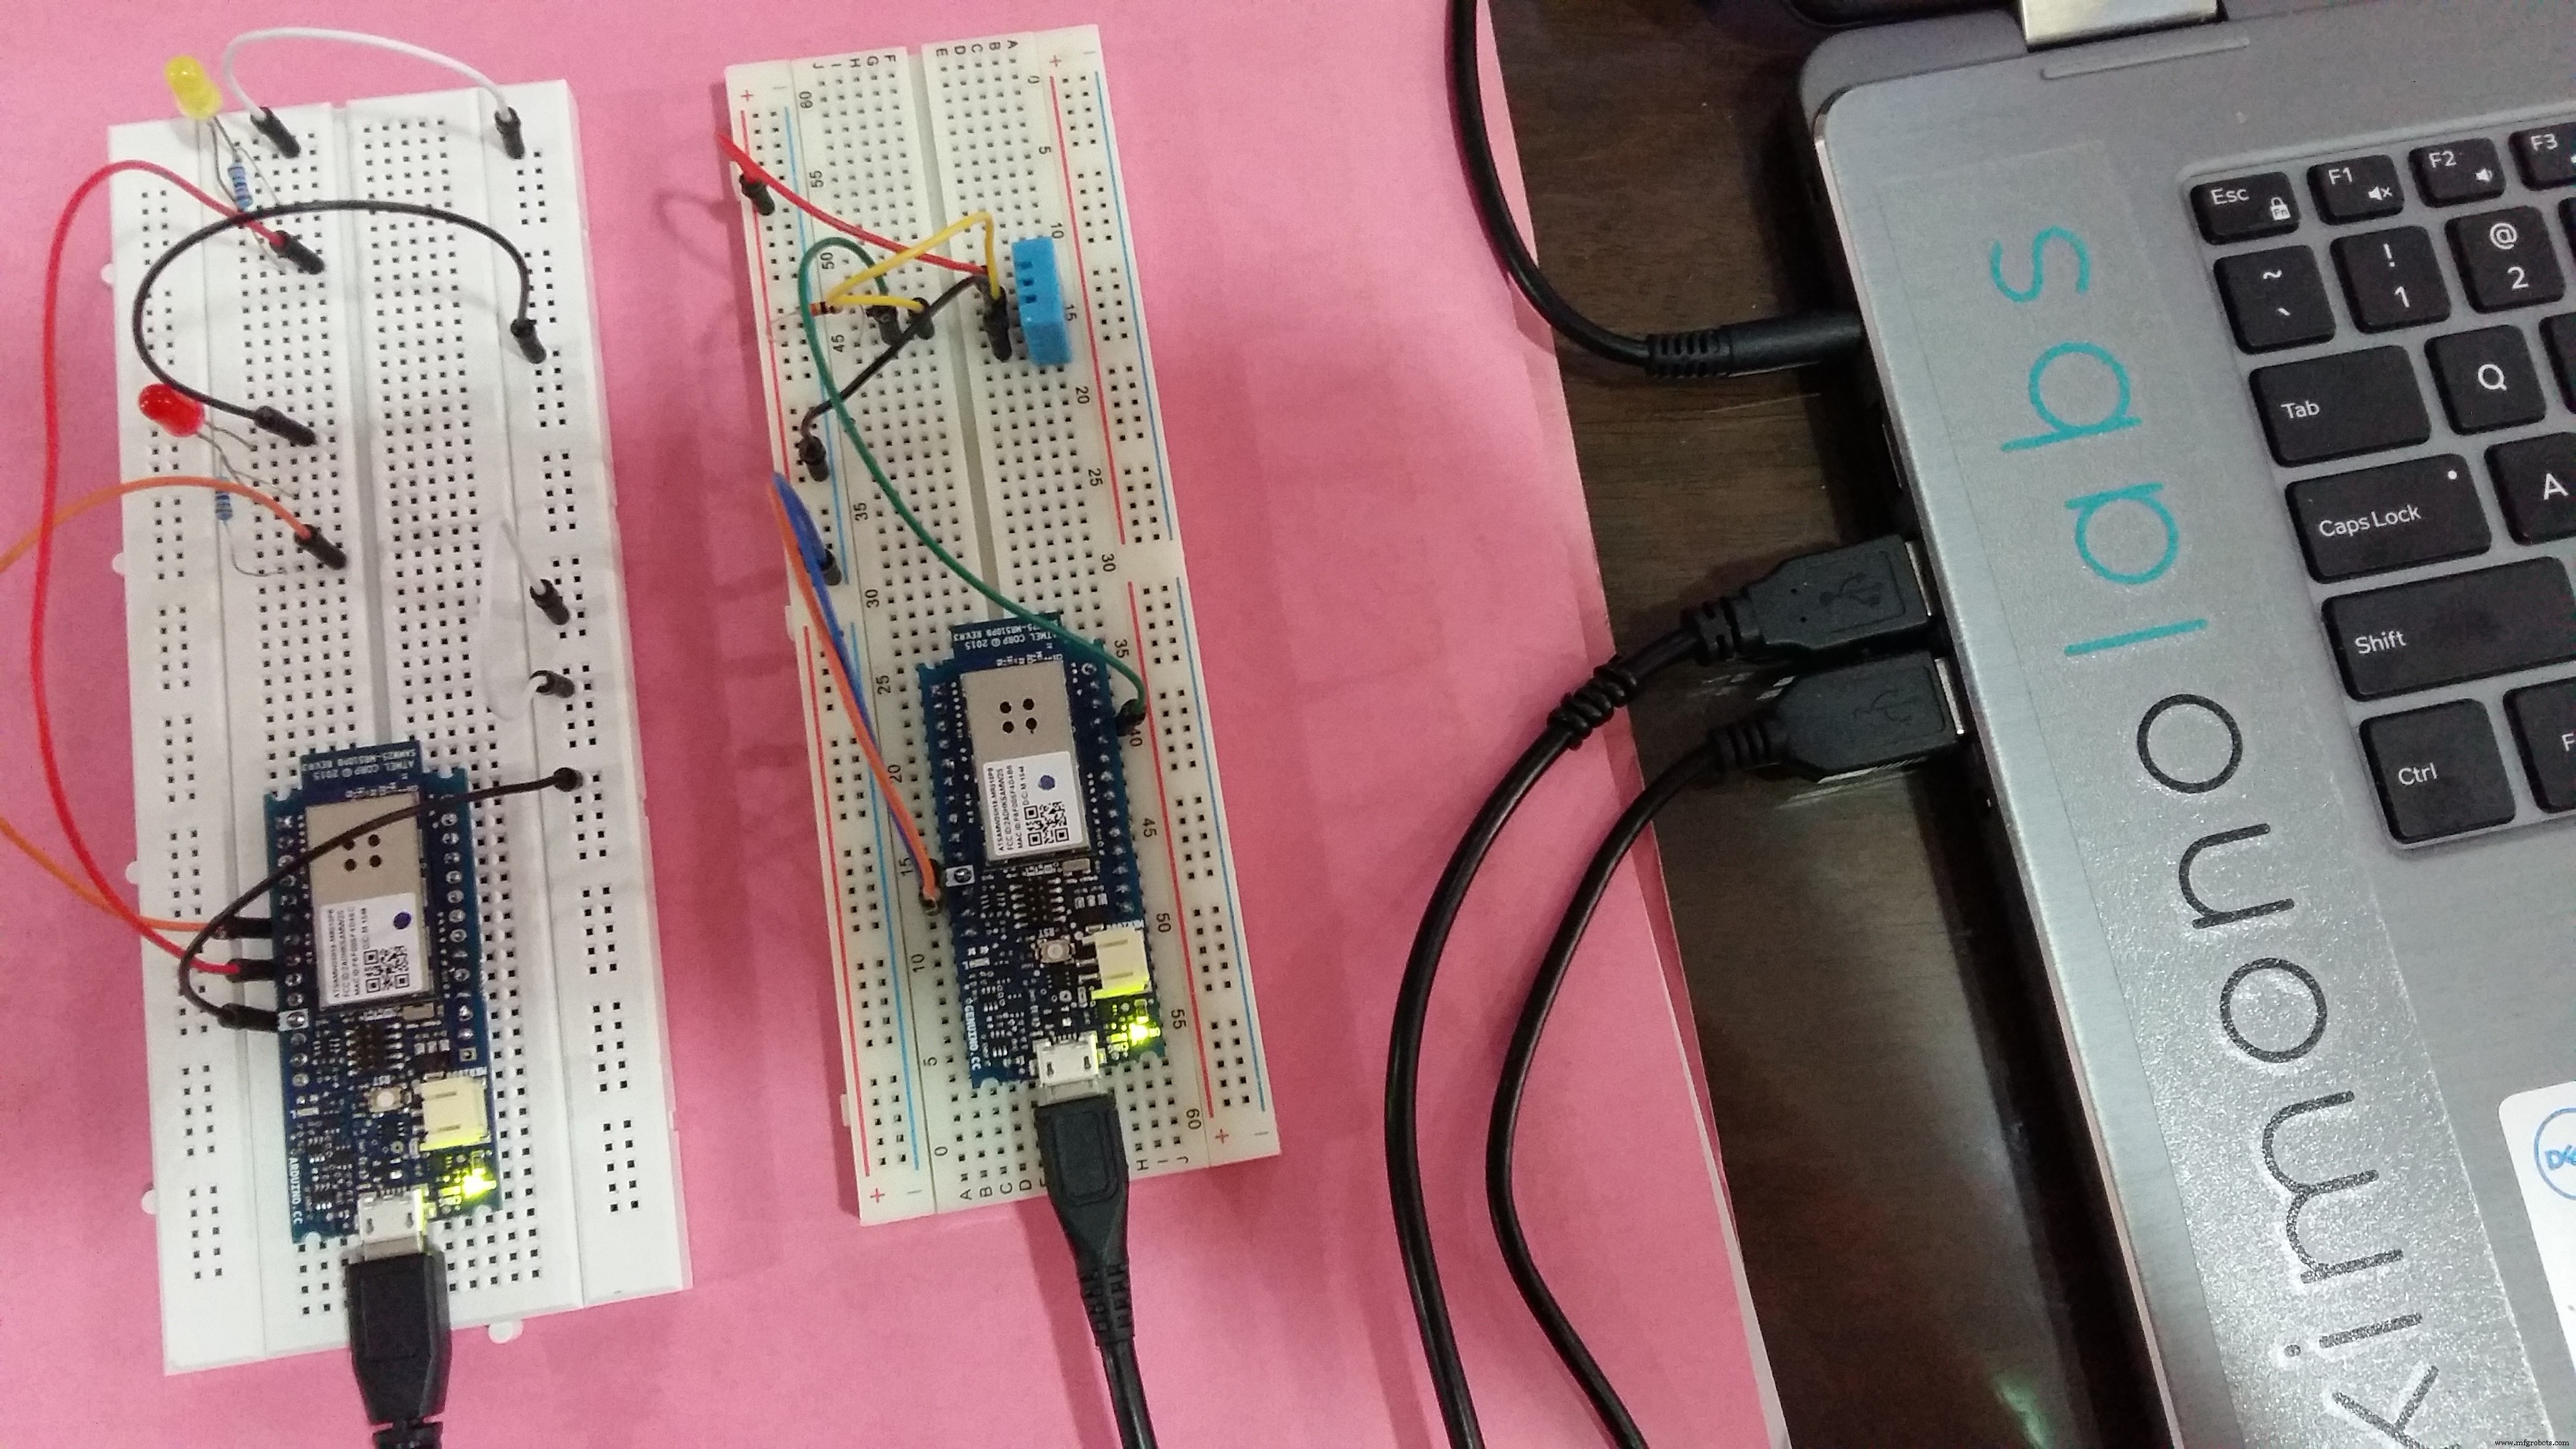
<図>
コード
- artik_dht11_sensor.ino
- artik_led_actor.ino
artik_dht11_sensor.ino C / C ++
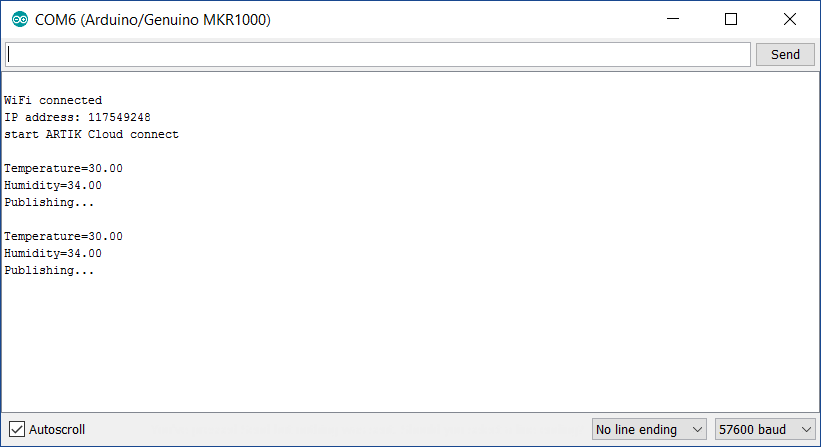
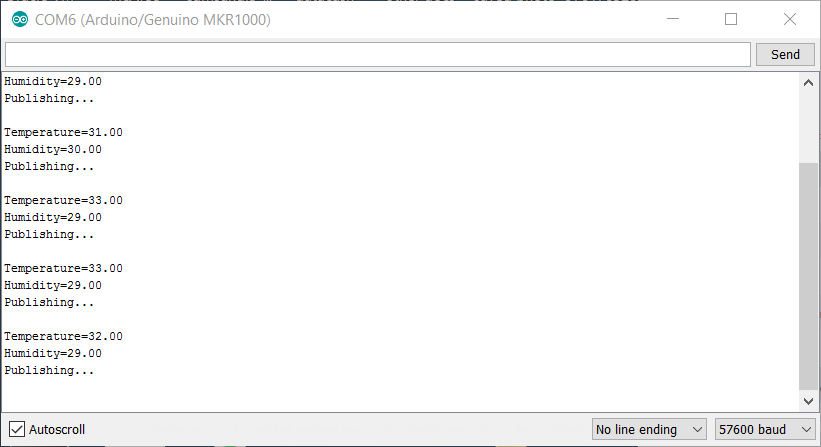
#include#include #include #include "DHT.h" #define DHTPIN 2 //接続しているデジタルピン#defineDHTTYPE DHT11 / / DHT 11DHT dht(DHTPIN、DHTTYPE); const char * _SSID ="[Wi-Fi SSID]"; const char * _PASSWORD ="[Wi-Fi Password]"; // ARTIK Cloud MQTT paramschar mqttCloudServer [] ="api.artik.cloud"; int mqttCloudPort =8883; char mqttCloudClientName [] ="ARTIK-Arduino"; char mqttCloudUsername [] ="[device-id]"; char mqttCloudPassword [] ="[device-token]"; char mqttCloudDataOut [] ="/v1.1/messages/[device-id]"; WiFiSSLClient ipCloudStack; MQTTClient mqttCloudClient; char buf [128]; float温度、湿度; int n =0; void getNextSample(float * Temperature、float * Humidity){//測定の合間に数秒待ちます。 delay(2000); //温度または湿度の読み取りには約250ミリ秒かかります! //センサーの読み取り値も最大2秒古い場合があります '古い'(非常に遅いセンサー)*湿度=dht.readHumidity(); //温度を摂氏(デフォルト)として読み取ります* Temperature =dht.readTemperature(); //温度を華氏として読み取ります(isFahrenheit =true)// float f =dht.readTemperature(true); // printf( "Temp =%。2f、Pres =%。2f、Humi =%。2f \ n"、Temp_c__f、Pres_hPa__f、Humi_pct__f); Serial.print( "Temperature ="); Serial.println(* Temperature); Serial.print( "Humidity ="); Serial.println(* Humidity);} void setup(){Serial.begin(57600); dht.begin(); // Wifi設定WiFi.begin(_SSID、_PASSWORD); while(WiFi.status()!=WL_CONNECTED){delay(500); Serial.print( "。"); } Serial.println(); Serial.println( "WiFi接続"); Serial.print( "IPアドレス:"); Serial.println(WiFi.localIP()); mqttCloudClient.begin(mqttCloudServer、mqttCloudPort、ipCloudStack); Serial.println( "ARTIKクラウド接続を開始"); Serial.println(); while(!mqttCloudClient.connect(mqttCloudClientName、mqttCloudUsername、mqttCloudPassword)){Serial.print( "*"); delay(500); }} void messageReceived(文字列トピック、文字列ペイロード、char *バイト、unsigned int length){} void sendToArtikCloud(floattemperature、floathemium){loadBuffer(temperature、heimumty); //現在の値をバッファにロードしますmqttCloudClient.publish(mqttCloudDataOut、buf);} void loadBuffer(float Temperature、float Hydraulic){StaticJsonBuffer <200> jsonBuffer; JsonObject&dataPair =jsonBuffer.createObject(); dataPair ["temperature"] =温度; dataPair ["humidity"] =湿度; dataPair.printTo(buf、sizeof(buf));} void loop(){if(++ n> 10){Serial.println( "Stopped。"); exit(0); } mqttCloudClient.loop(); delay(1000); getNextSample(&temperature、&humidity); Serial.println( "発行中..."); Serial.println(); sendToArtikCloud(温度、湿度); delay(15000);}
artik_led_actor.ino C / C ++
#include#include #include #define LED_RED_PIN 11#define LED_YELLOW_PIN 13#define RED_DELAY 5000#define YELLOW_DELAY 10000const char * _SSID ="[Wi-Fi SSID ] "; const char * _PASSWORD =" [Wi-Fiパスワード] "; // ARTIK Cloud MQTT paramschar mqttCloudServer [] ="api.artik.cloud"; int mqttCloudPort =1883; char mqttCloudClientName [] ="ARTIK-Arduino"; char mqttCloudUsername [] ="[device-id]"; char mqttCloudPassword [] ="[device-token]"; char mqttCloudActionsIn [] ="/v1.1/actions/[device-id]"; WiFiClient ipCloudStack; MQTTClient mqttCloudClient; char buf [128]; int savedRedValue、savedYellowValue; unsigned long savedRedTime、savedYellowTime; void setup(){Serial.begin(57600); pinMode(LED_RED_PIN、OUTPUT); pinMode(LED_YELLOW_PIN、OUTPUT); savedRedValue =savedYellowValue =0; // Wifi設定WiFi.begin(_SSID、_PASSWORD); while(WiFi.status()!=WL_CONNECTED){delay(500); Serial.print( "。"); } Serial.println(); Serial.println( "WiFi接続"); Serial.print( "IPアドレス:"); Serial.println(WiFi.localIP()); mqttCloudClient.begin(mqttCloudServer、mqttCloudPort、ipCloudStack); Serial.println( "ARTIKクラウド接続を開始"); Serial.println(); while(!mqttCloudClient.connect(mqttCloudClientName、mqttCloudUsername、mqttCloudPassword)){Serial.print( "*"); delay(500); } mqttCloudClient.subscribe(mqttCloudActionsIn);} void messageReceived(String topic、Stringpayload、char * bytes、unsigned int length){Serial.print( "topic ="); Serial.println(トピック); Serial.print( "payload ="); Serial.println(ペイロード); Serial.print( "bytes ="); Serial.println(バイト); Serial.print( "length ="); Serial.println(長さ); parseBuffer(payload);} void parseBuffer(Stringpayload){StaticJsonBuffer <200> jsonBuffer;文字列json =ペイロード; JsonObject&root =jsonBuffer.parseObject(json); const char * nameparam =root ["actions"] [0] ["name"]; const int actionLEDRed =root ["actions"] [0] ["parameters"] ["led_red"]; const int actionLEDYellow =root ["actions"] [0] ["parameters"] ["led_yellow"]; Serial.print( "name ="); Serial.println(nameparam); Serial.print( "led_red ="); Serial.println(actionLEDRed); Serial.print( "led_yellow ="); Serial.println(actionLEDYellow); Serial.println(); if(actionLEDRed ==1){if(savedRedValue!=actionLEDRed){digitalWrite(LED_RED_PIN、HIGH); savedRedValue =actionLEDRed; } savedRedTime =millis(); } else {if(savedRedValue!=actionLEDRed){if(millis()-savedRedTime> RED_DELAY){digitalWrite(LED_RED_PIN、LOW); savedRedValue =actionLEDRed; }}} if(actionLEDYellow ==1){if(savedYellowValue!=actionLEDYellow){digitalWrite(LED_YELLOW_PIN、HIGH); savedYellowValue =actionLEDYellow; } savedYellowTime =millis(); } else {if(savedYellowValue!=actionLEDYellow){if(millis()-savedYellowTime> YELLOW_DELAY){digitalWrite(LED_YELLOW_PIN、LOW); savedYellowValue =actionLEDYellow; }}}} void loop(){mqttCloudClient.loop(); delay(500); }
製造プロセス