


3D プリントのヒント:プリント前に
3D プリンタのユーザーは、パーツを作成する際に特定の問題に遭遇する可能性があるため、アドバイスに従うことをお勧めします。 3D プリントを開始する前に、発生する可能性のあるエラーやエラーを防ぐために .
1.ファイル .STL を確認
3D プリンタのユーザーが、印刷したいインターネット モデルをデザインまたはダウンロードした場合、モデルをチェックして、面やサーフェスの間に領域が開いていないことを確認する必要があります 、それらが存在するため、ピースからのボイドまたはフィラメントの形でエラーが発生します。これを回避するには、プログラムのプレビューで、GCode (Pronterface、Cura、Simplify3D、Slic3r) の印刷または生成に使用される部分を確認するだけです。 、上記のギャップまたは不良ジョイントを探します。
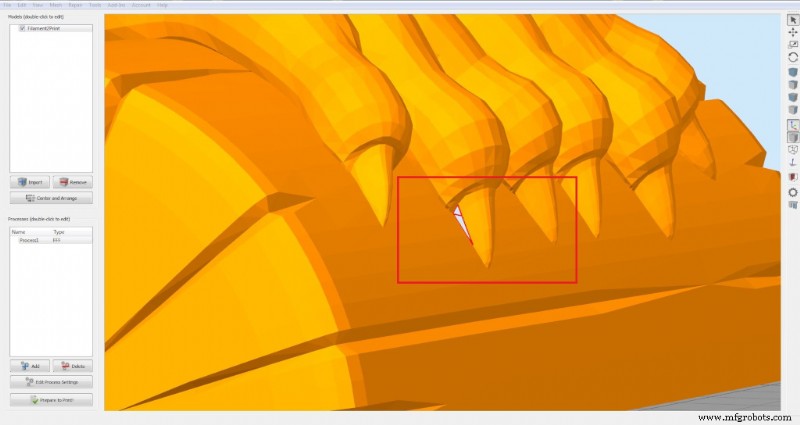
画像 1:オープン エリア
2.印刷設定
印刷パラメータは非常に重要です (温度、速度、サポートの種類など)、各材料、各ピース、フィラメント直径、さらには 3D プリンター モデルに合わせて調整する必要があります ユーザーによって使用されます。このようなエラーを起こさないように、常に製造元のアドバイス (温度と印刷速度) に従い、さまざまな温度で印刷テストを実行してください。簡単なテストとして、タワーを印刷し、温度を 1 cm ごとに 5 ºC 変化させて、常にメーカーの制限内でどちらが最適かを確認します (リンク 1、リンク 2)。
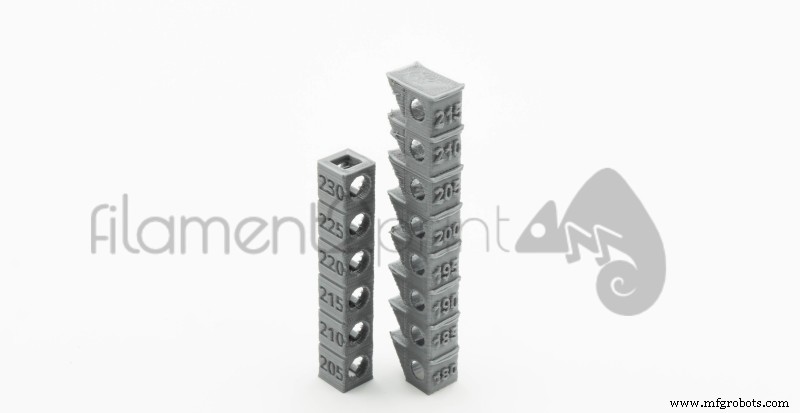
画像 2:タワーのキャリブレーション
3. フィラメントの量を確認
3D プリント プログラム (Cura または Simplify3D) は、作成するピースの重量の見積もりを容易にします .このデータを使用して、利用可能なフィラメントが十分かどうかを確認し、不完全な 3D プリントを回避できます。
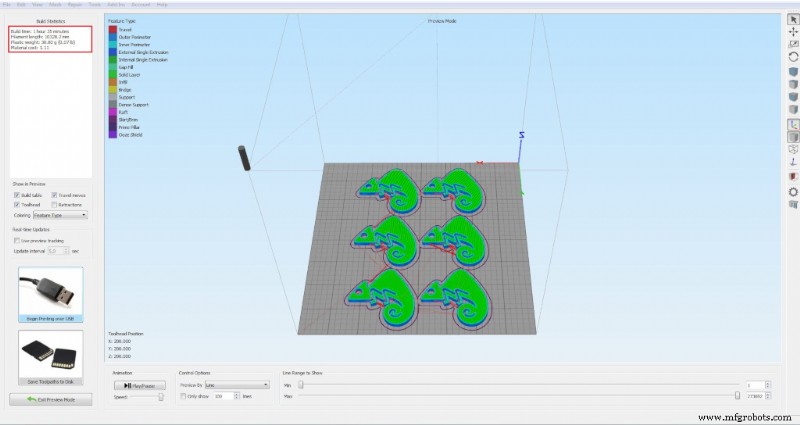
画像 3:ピースの重量
4.基本状態
The state of the base is crucial, especially so that there is no "warping". With the use of Kapton Tape and Blue Tape you should check for scratches or tape-free areas in the 3D printing area. In the same way, in case of employing BuildTak you should be checked for scratches and tears, which can cause the base part to peel off in large prints and durations. If a glass base is used directly, it shouldn't present deep scratches or detachments, which will cause the piece to peel off during 3D printing. For 3D impressions on glass base it is advisable to use a sticky spray as 3DLac or DimaFix.
5. Leveling base
To ensure correct and quality 3D printing, the base must be properly leveled and calibrated. The process of how to perform the leveling of the base is explained in the following article: Leveling and calibration of the 3D printer base.
6. Filament purge
The last step that must be done before 3D printing begins is the filament purge. With this purge, the filament is prevented from starting to come out of the extruder with delay and the 3D printing has to be reworked due to the absence of material in the first layers. This process can be done manually by heating the extruder to the temperature of the filament to be used and pushing it until the flow is continuous; Or increasing the number of turns you make by copying the silhouette of the piece (Skirt) before starting 3D printing. This parameter is modified in the 3D printing program that is used.
After following all the steps mentioned above, parctically all errors that occur due to 3D printing (FDM / FFF) are eliminated.
3Dプリント